Cisco 9800 RP SSO Replacement
A quick guide on an SSO controller replacement and what may cause you some headaches.
Trevor Krzesnik
11/2/20245 min read
Cisco 9800 SSO Replacement with RP redundancy
Early one morning, we got an email alert stating that one of our controllers had failed over to the backup. After a little investigation and looking through the logs, we think we have found what the problem is....ABENDS! We sent our logs over to TAC and waited for the response.


Pretty much exactly what we thought we needed to do unfortunately so we let the our staff know about the issue and the steps we were taking to resolve them.
When we received the replacement controller, we followed the Cisco recommended steps on replacement but we still ran into some issues.
Issue #1 - The Mobility MAC was showing 0000.0000.0000 after HA Sync had completed between the two controllers
Issue #2 - The Wireless Management Interface address did not match what the primary address was. In fact it was completely blank.
We ran the recommended commands and everything looked as though it was redundant. We even verified through TAC that everything was looking how it it should. Only thing left to do at this point was to do a fail-over test and verify. We let the appropriate parties know that this was going to happen and, if all goes well, you won't notice a thing but worst case scenario, you're going to be without Wi-Fi for a little bit while we get everything back up. You can guess what happened. It failed.
After we got everything back online we went to bed scratching our heads wondering what had happened. All the tests said it should have failed over with no problems. The next morning we looked through the configs. They were copied over exactly how it shows on the controller currently online so what is going on? For some reason, the country code was not being copied over so when we would try to fail-over it didn't know what regulatory domain to operate under so it couldn't come online. To save you all the headache of going through what we went through, I have posted the necessary steps to get everything in the right condition to bring your replacement controller online in a fully redundant state.
Power on your replacement controller WITHOUT the RP port and network uplink ports plugged in
Once the controller is online, select no on if you want to follow the setup wizard.
Check your software version and make sure the replacement is matching what is currently installed.
For upgrades through the CLI, follow the CLI Software Upgrade instructions in the link:
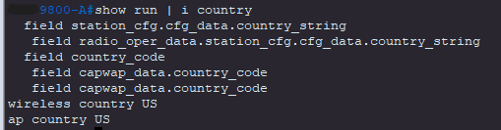
Once the upgrade is complete, check to see if your country code has been set before putting your config onto the replacement controller:
If country code has not been set, turn off the 2.4 GHz and 5 GHz radios to set your country code:
Commands
ap dot11 24ghz shutdown
ap dot11 5ghz shutdown
ap country US (not sure if case sensitive but have been going with capitals)
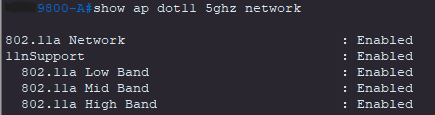
After the country code is set, turn back on your radios
Commands
No ap dot11 24ghz shutdown
No ap dot11 5ghz shutdown
Check to make sure your radios have been re-enabled and you have your correct country code:
You are now ready to add your configuration to the controller
TROUBLESHOOTING
If you copy your configuration onto the replacement controller BEFORE you set your country codes you may get the following messages when trying to set the country code or turn on/off the radios:
% node-1:dbm:wireless:Country 237 is unsupported. Please configure supported country code
802.11b network not supported for this country code
FIX - you must erase your config and set your country code before copying your configuration to the controller
Command
Write erase
Do not save configuration
ADDING CONFIG from a USB DRIVE
Backup your current config from the controller to a USB Drive
When the USB drive is recognized on the controller, you will get a message showing 'USB0' or 'USB1' depending on what you plugged into.
Copy config from USB to Controller
Copy usb0:"document name".cfg running-config
Copy running-config startup-config
CHECKING YOUR CONFIGURATION
Check to make sure your wireless interface matches what is on your current running controller
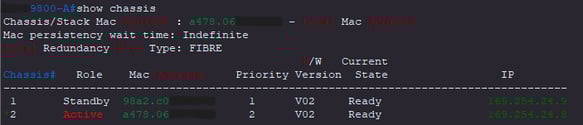
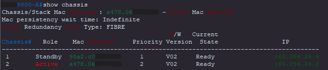
Check your chassis and priority level
If you need to make any changes to your chassis number or priority level use the following commands:
Chassis 1 renumber X
Chassis 1 priority X
2 is a higher priority than 1
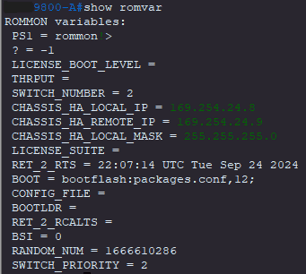
Set your local and remote local IP address
Chassis redundancy ha-interface local-ip <x.x.x.x> <local IP subnet> remote-ip <x.x.x.x>
Those addresses will show in your show chassis command
You can also check with the following:
You are now ready to reboot your controller and attempt HA Sync
Command - reload
While your controller is rebooting you will plug in your RP Port and Network Uplinks
In the GUI you can navigate to Monitor>System>Redundancy to check your status
HA SYNC COMPLETE
WMI Address and Mobility MAC should match between the Active and Standby Controllers
If you are showing 0000.0000.0000, as your Mobility MAC on the Standby, you will need to check your configuration as it more than likely was not successful in creating redundancy.
Check to make sure your ap country code was set properly and attempt again
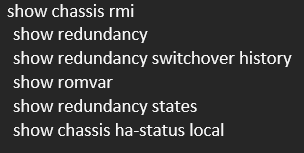
You can also run these commands to check redundancy:
Please keep in mind that these commands may show you are in a redundant state but you will not be able to fail over successfully.
If these commands are successful and you have matching WMI and Mobility MAC addresses you are ready to attempt a failover test.